A CREATIVE MAMA GUIDE
Tiny hands, thankful hearts: 8 Thanksgiving keepsakes to make together
Turn your baby or toddler’s handprint or footprint into turkey cards, fall wreaths, table decorations, and meaningful gifts for grandparents—with paint-free options.
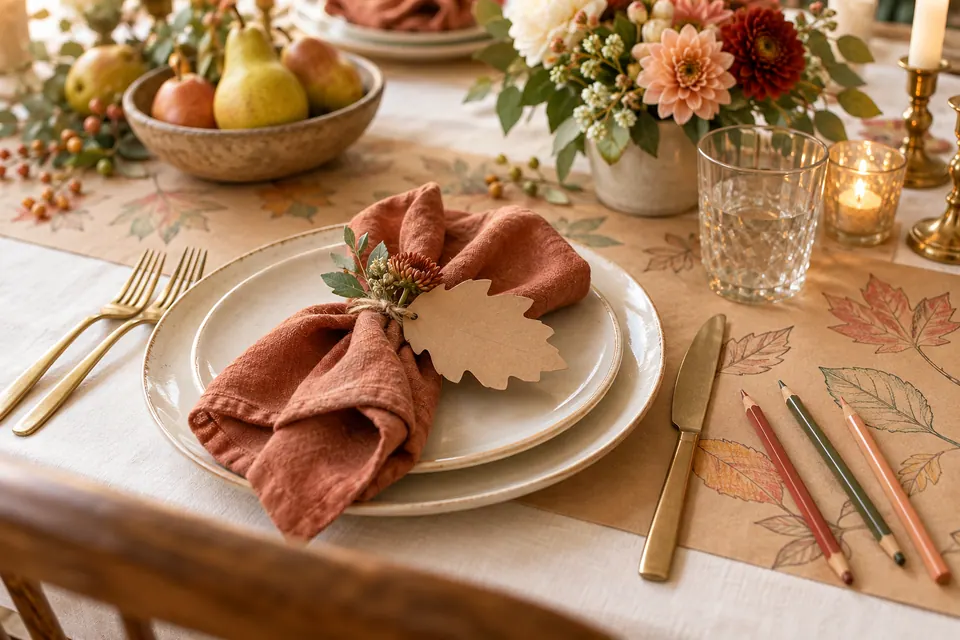
Those little hands will not stay this size forever. A paper turkey, a wreath made from tiny hand shapes, or a simple note for Grandma can hold a whole season of family memories. Pick one project below, capture one outline or suitable print, and do the decorating later. Babies do not need to complete a craft: their grown-up can make something lovely from a single outline. Toddlers can choose a color, tell you what they love, or help arrange large paper shapes with supervision. These are original ideas to adapt at home, not product tests.
Make one print, then let the grown-up do the rest
Have paper, a protected work surface, cleanup supplies, and a drying spot ready before inviting your child over. For a paint-free version, an adult loosely traces a relaxed hand or foot with a pencil on paper without marking the skin, then cuts the outline after the child has moved away. If a product is appropriate for your child’s age and this use, follow its directions, support your child comfortably, and bring the paper to the hand or foot rather than asking them to stand on slippery paint. Press once and lift straight away; wash and dry the hand or foot before continuing. Stop if your child pulls away or dislikes it. Let the print dry fully, then photograph or scan it for extra copies. A smudged print or a traced silhouette still makes a wonderful keepsake.
Let’s make it happen
Handprint turkey place cards
Best for a Thanksgiving table or a small card for grandparents. Start with a traced hand on rust or golden paper, or a dried handprint. Turn the thumb into the turkey’s head with an adult-drawn eye and beak; the four fingers become its feathers. Leave a generous border when an adult cuts around it. Glue the turkey to the front of a folded cardstock tent and write the guest’s name underneath. Use copies of one hand shape for a whole table. Add the child’s name and year on the back, then invite guests to take their card home. Keep paper decorations away from food and hot dishes.
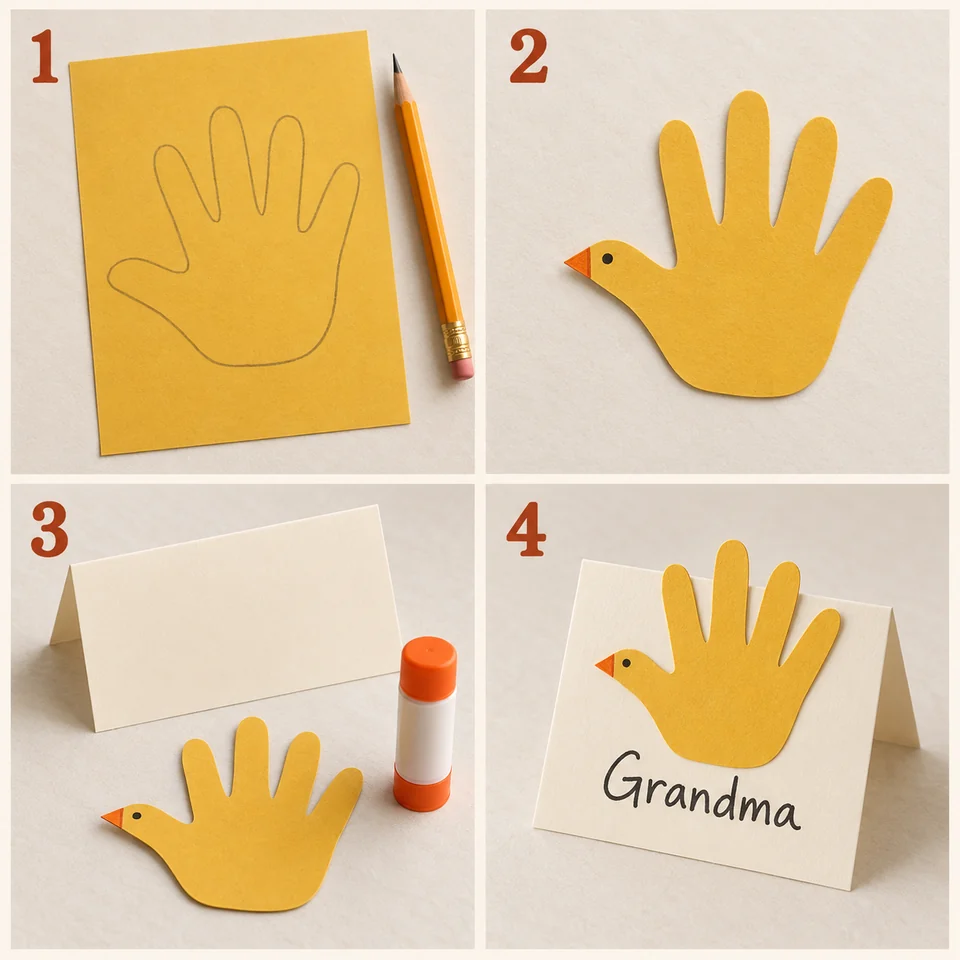
- Trace a relaxed hand or copy an existing outline.
- Cut the shape and draw a turkey face on the thumb.
- Fold a cardstock tent and position the turkey.
- Glue it in place and add the guest’s name.
Footprint turkey thank-you cards
Best for a baby’s first Thanksgiving or a thank-you to someone who helps your family. Place a foot outline vertically with the toes at the top; the outline becomes the turkey’s long body. Glue large paper feathers behind it, then let an adult draw a little face near the toes and two feet below the heel. Write “So thankful for you” on the front of a folded card. Inside, add a real reason: “Thank you for our Tuesday walks” or “Thank you for all the bedtime stories.” A toddler can dictate the message while an adult writes. One outline is enough to make several cards.
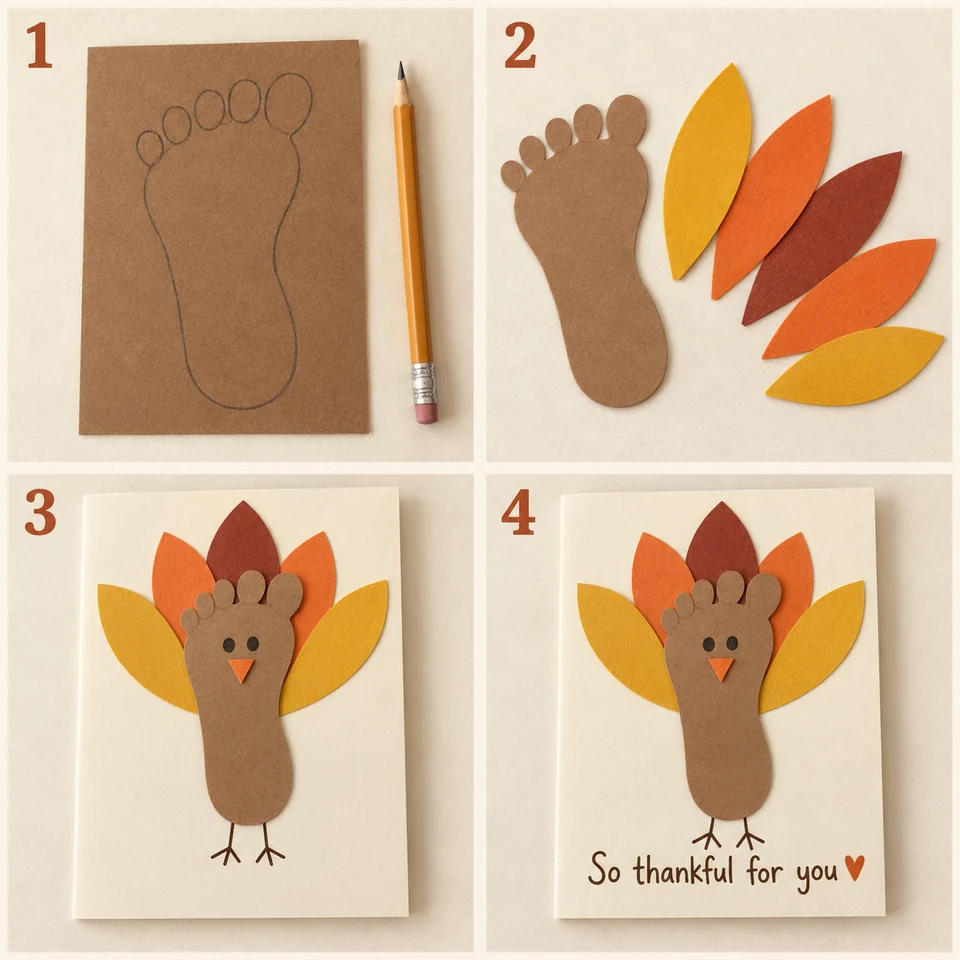
- Start with a foot outline, toes up.
- Cut large paper feathers to go behind the foot.
- Glue the shapes down and draw a face and feet.
- Add your thank-you message and a name.
A handprint autumn wreath
Best for an indoor wall or a gift for a family member. Trace one hand, then use that paper template to cut six to ten copies in pumpkin, mustard, blush, and brown. An adult cuts a wide ring from sturdy cardstock and glues the palms onto the ring, with the fingers pointing outward like leaves. Overlap the shapes just enough to hide the backing. Add a large paper label reading “Our little reasons to be thankful.” Write a name and date on the back. This version needs no paint and no repeated printing. An adult hangs it securely out of children’s reach; keep it away from cribs and sleep spaces.
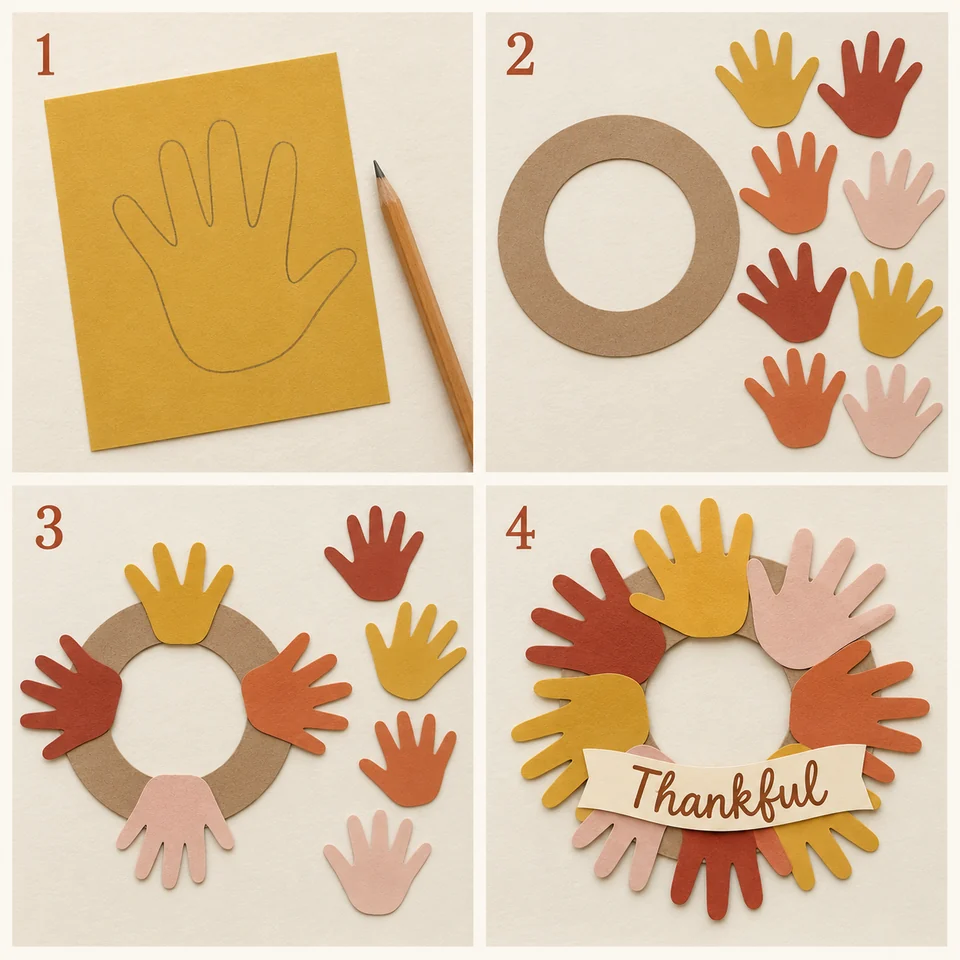
- Use one hand outline as a template.
- Cut six to ten warm-colored copies and a wide paper ring.
- Glue the palms around the ring, with fingers pointing out.
- Add a thankful label and the year.
The family gratitude tree
Best for a framed gift or a yearly tradition. An adult draws a simple trunk and branches on a large sheet. Arrange copied hand shapes above the branches as the leafy crown; mix a baby’s small outline with a toddler’s larger one. Ask each family member for one thing they are thankful for and write it inside a hand shape or beside it. A toddler’s answer can be wonderfully specific—keep their exact words. Leave a little white space and add the year at the bottom. Frame a copy for grandparents and keep the original flat. Next year, make a fresh page rather than trying to match this year perfectly.
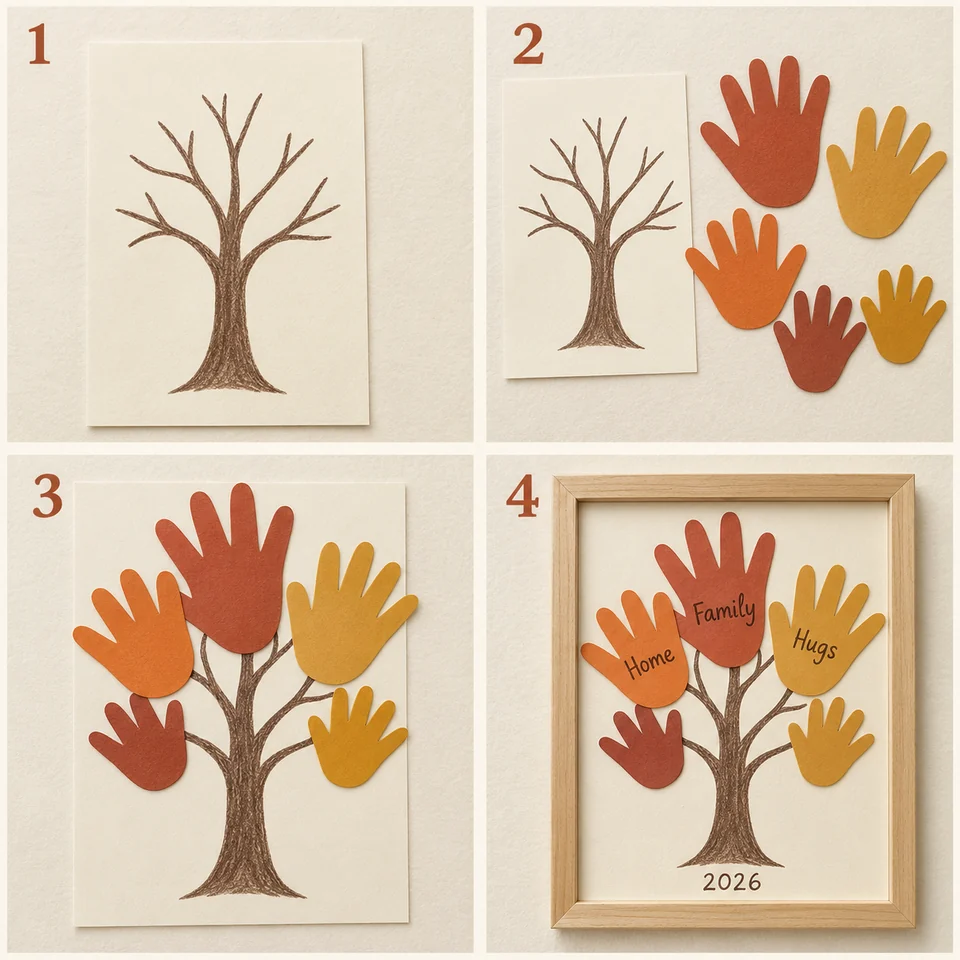
- Draw a trunk and simple branches.
- Cut copies of small and larger hand outlines.
- Arrange the hands above the branches as leaves.
- Add thankful words, the year, and a frame.
A keepsake runner for the grown-ups’ table
Best for bringing family artwork into Thanksgiving dinner. Make your prints or outlines on separate sheets first, let everything dry, and copy them. Arrange the copies down a length of kraft paper with handwritten names, little leaves, and a few family memories. Adults can glue the copies down after the children have finished their part. Keep the runner short enough that a child cannot pull it, and leave clear spaces for serving pieces. Treat it as decoration, never a direct food-contact surface. After the gathering, cut out a favorite section and save it in an album. Photograph the whole runner before recycling the rest.
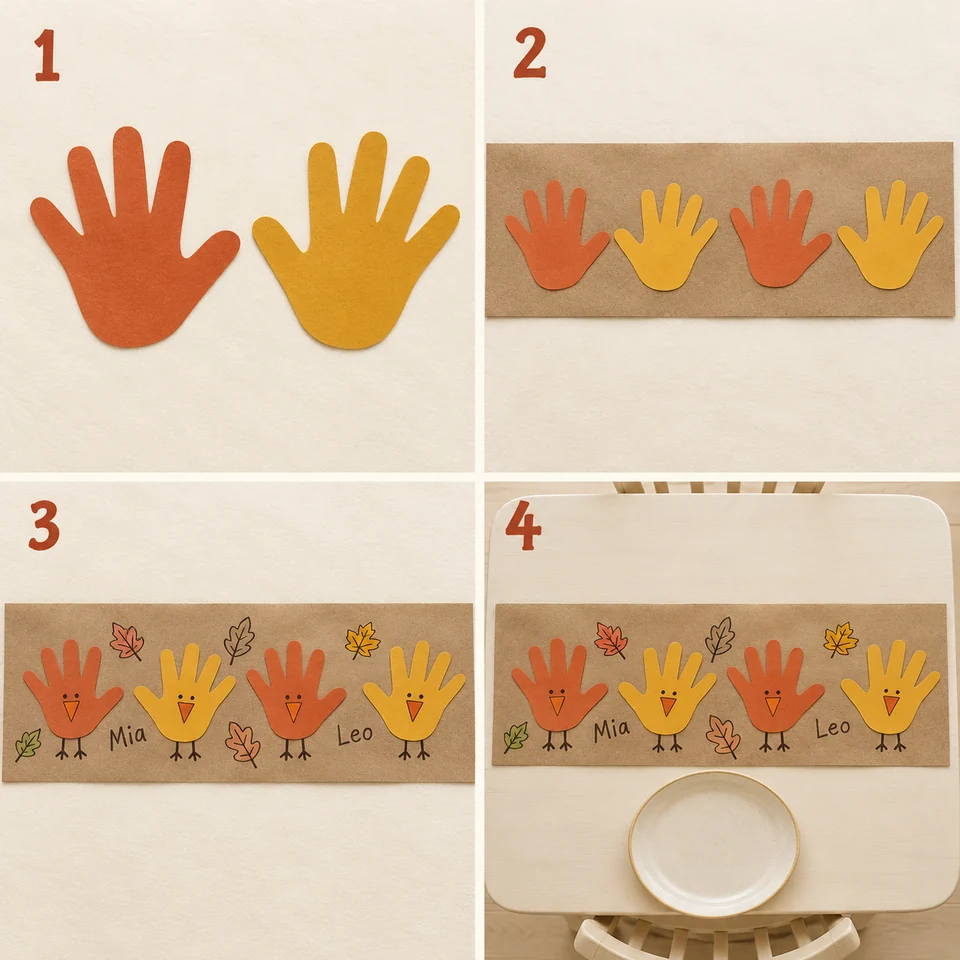
- Make and copy a hand outline.
- Arrange paper copies along a strip of kraft paper.
- Glue them down; add names, leaves, or little turkey faces.
- Display the runner, then save a favorite section.
Footprint harvest corn artwork
Best for a simple autumn display or a card that travels easily in the mail. Use a yellow paper foot outline, with the heel at the top and toes at the bottom. An adult adds rows of rounded kernel shapes with a pen, then glues two broad green paper husks behind the sides. Keep the toes visible instead of trimming them into a perfect oval—the tiny shape is the memory. Make one cob for each child on a cream backing sheet and add their names underneath. A toddler can choose the husk colors or describe their favorite fall snack. Use drawn kernels, not dried corn or other loose pieces.
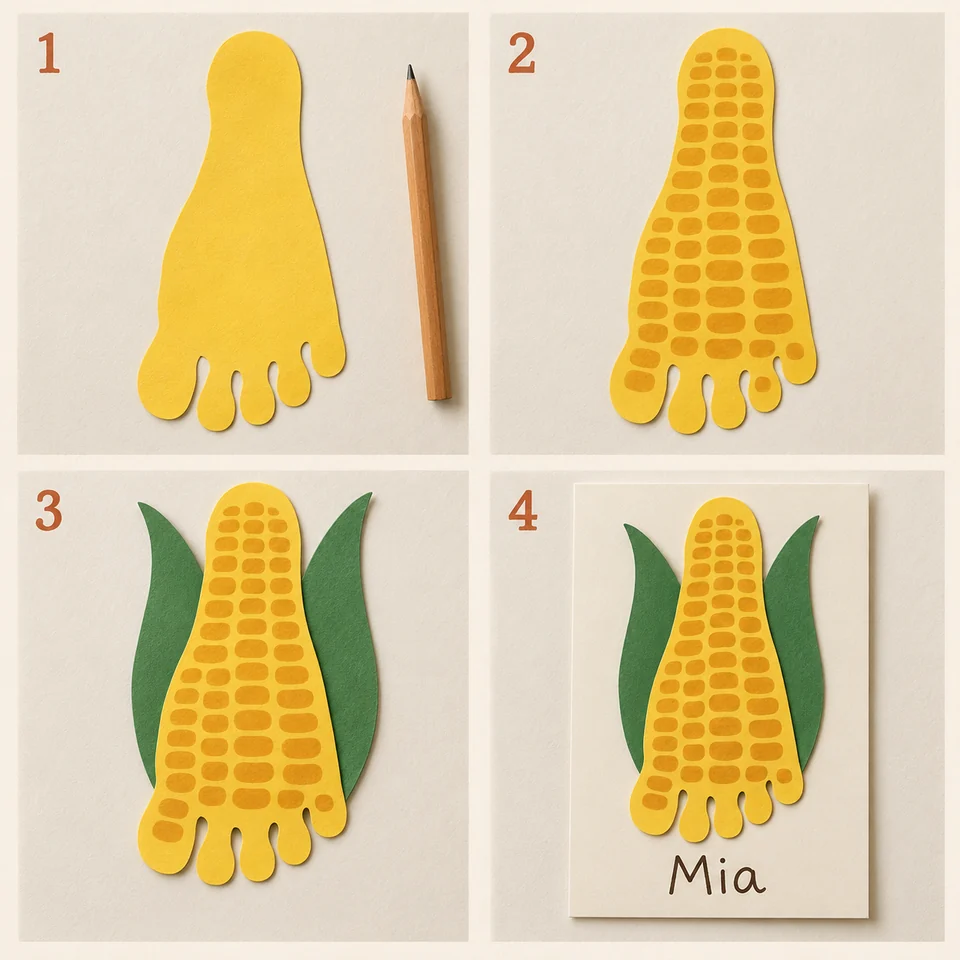
- Cut a yellow footprint with the heel at the top.
- Draw rows of rounded kernels.
- Glue two broad green husks behind the sides.
- Mount on cream paper and add a name.
A “thankful for you” handprint bouquet
Best for Grandma, Grandpa, a caregiver, or a Thanksgiving host. Cut out three to five copies of a hand outline in warm fall colors. Arrange them as flower heads on a sheet of cardstock, with fingers pointing up or gently outward. An adult draws long stems that meet near the bottom and adds a paper vase shape. Write one short appreciation on each flower: “You read with me,” “You make us laugh,” or a toddler’s own words. Put “A handful of thanks” beneath the bouquet. Frame it, slip it into a large envelope, or attach a small copy to a host gift. No sticks, wire, or real vase needed.
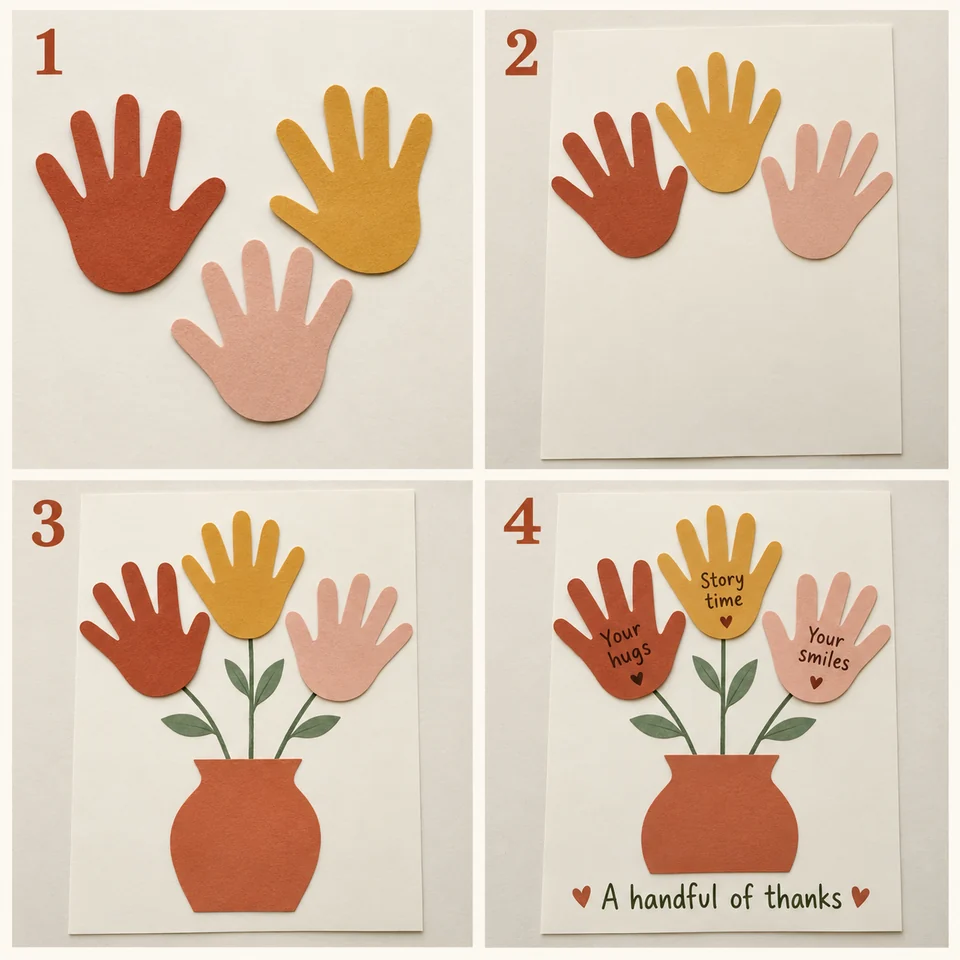
- Cut three to five warm-colored hand shapes.
- Arrange them as flower heads.
- Draw stems and add a paper vase.
- Write little thank-you notes and a title.
A first-Thanksgiving memory page
Best for a baby book or an easy gift you can repeat each year. Place one hand outline and one foot outline side by side on a sheet of cardstock. Add the child’s name, age, date, where you celebrated, and who was there. Leave a space for one family photo and a sentence about the day. For a toddler, add their answer to “What made you happy today?” Decorate the border with adult-drawn leaves or a few large paper shapes. Display the page at your gathering, then store it flat in a keepsake folder. Make a second copy for grandparents so you can keep the original without having to choose.
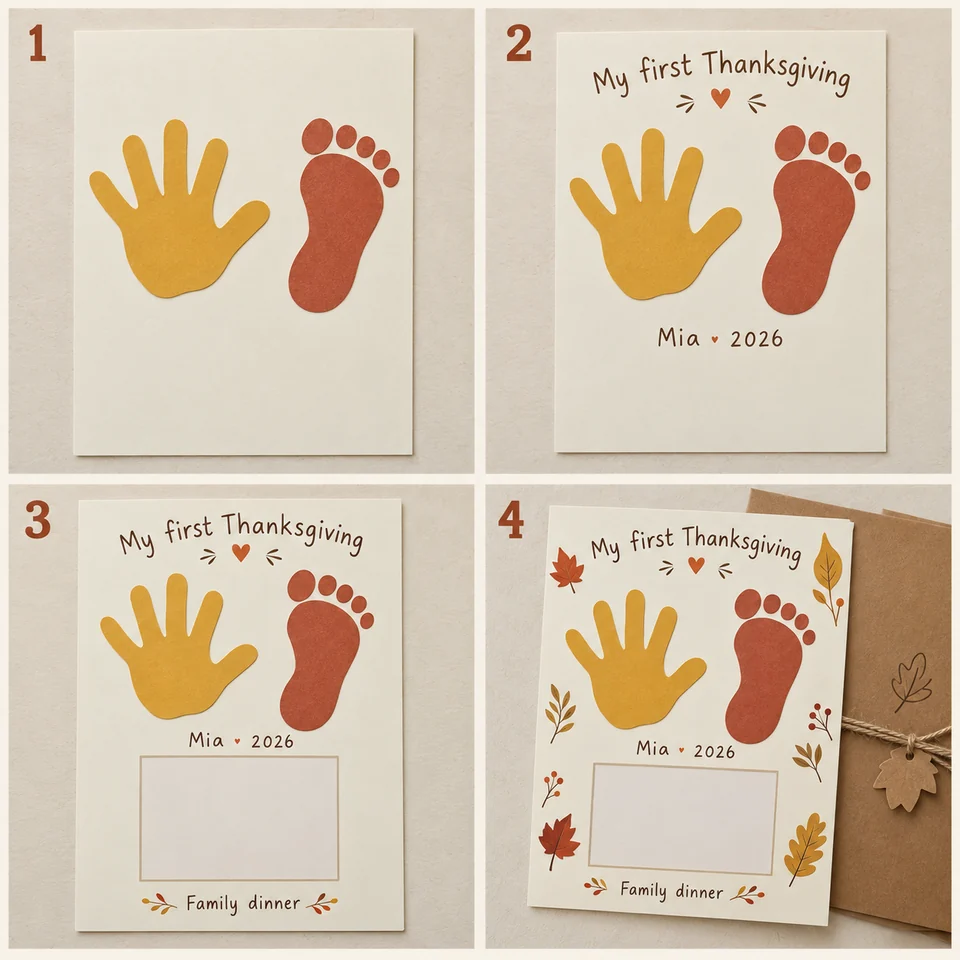
- Arrange one hand and one foot outline.
- Add a name, age, date, and who celebrated.
- Leave room for a photo and one memory.
- Add a few drawn leaves and keep a copy.
A baby-and-toddler version that feels like one family
Use one small foot outline as a turkey body and the older child’s hand shapes as the feathers. Or place both children’s hand shapes on the same gratitude tree. Label each shape on the back before assembling. Let the toddler choose where their own piece goes; matching prints are not the goal. If only one child wants to join today, add the other child’s outline another day.
Little words to write beside the print
Try “Tiny hands, thankful hearts,” “A handful of thanks,” “Little feet, so much to be thankful for,” or “Our smallest blessing this Thanksgiving.” Pair the phrase with a specific memory or thank-you rather than filling the whole page with decoration. Add the child’s name and year while you remember them.
Make several gifts from one good print
Photograph the dry print square-on in even light or scan it. Keep an untouched digital original and label the file with the child’s first name and date. If preserving actual size matters, include a ruler beside the original when photographing and verify the size on a test print; phone images and printer “fit” settings can change it. Use copies for cards and gifts. Store the original flat and dry, away from sunlight, after the materials are fully dry.
If you have ten minutes
Choose the thank-you card. Trace one relaxed hand or foot, let an adult draw a turkey around it, and write one loving sentence. There is no need to make eight projects. A short, happy moment and an imperfect little outline are enough.
Materials and safety resources
Our craft ideas are original editorial suggestions. For choosing and using materials, consult these resources and the exact product label.
Planning for children or serving food? Visit our thoughtful hosting notes for useful guidance.
Useful things for this idea
These are editorial supply suggestions, not hands-on reviews. Check your cupboards first; borrow or improvise where the guide suggests it. Compare dimensions, labels, seller information, and current availability before ordering.
As an Amazon Associate I earn from qualifying purchases. Amazon buttons are paid links to searches, so you can compare current listings. How our shopping links work.
Colorful cardstock
One pack becomes leaf place cards, little ghosts, paper houses, and thank-you notes.
Compare on Amazon ↗ (paid link)Photo-safe keepsake album
Collects shower wishes, gratitude notes, and a few favorite party photos.
Compare on Amazon ↗ (paid link)Make the next step easy
Put your guest count, spending limit, one personal detail, and setup jobs on the free party planner. You can print it or save it as a PDF without signing up.
A little more inspiration
Christmas · 15–30 minutes per idea, plus drying
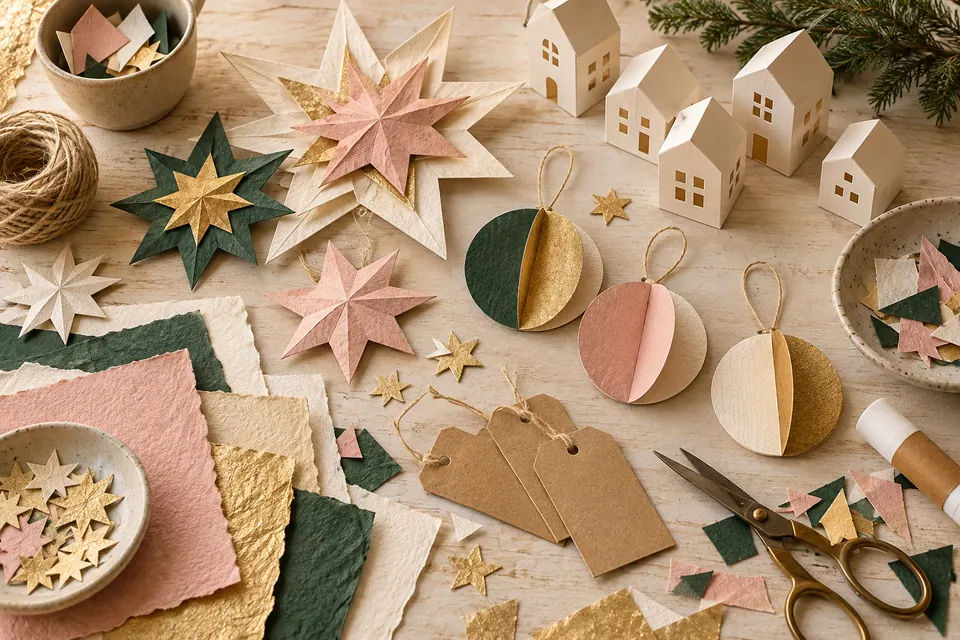
Little prints, lovely gifts: 8 Christmas handprint and footprint ideas
Make footprint reindeer, mistletoe cards, handprint trees, paper ornaments, and sweet grandparent gifts from your baby or toddler’s little prints.
Read the guide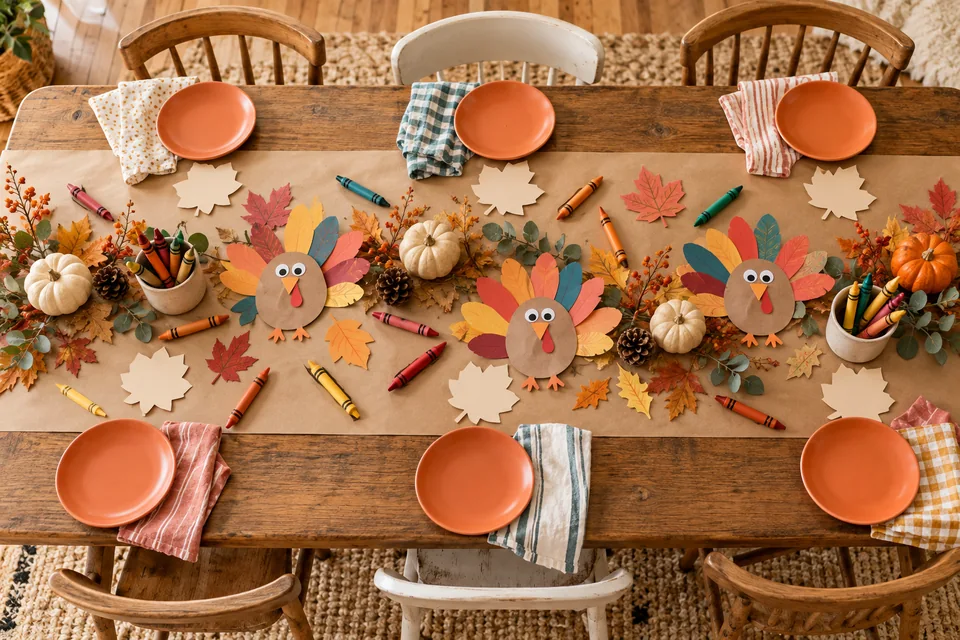
Thanksgiving · 20–30 minute setup
A Thanksgiving kids’ table that welcomes the kids
Set up a conversation-friendly drawing place with gratitude leaves, paper menus, and a calm activity basket.
Read the guideThanksgiving · 30–45 minutes plus drying
A Thanksgiving table everyone helped make
Make leaf place cards, a gratitude paper runner, and a tiny memory booklet with supplies you can use again.
Read the guide